ORB_SLAM3 설치 방법
https://hanseongbugi2study.tistory.com/88
[SLAM]ORB SLAM3 설치하기
설치 환경 Ubuntu 18.04 ROS Melodic OpenCV 3.2.0 Pangolin 설치 https://github.com/stevenlovegrove/Pangolin GitHub - stevenlovegrove/Pangolin: Pangolin is a lightweight portable rapid development library for managing OpenGL display / in Pangolin is a l
hanseongbugi2study.tistory.com
Realsense SDK 설치
https://github.com/IntelRealSense/librealsense
GitHub - IntelRealSense/librealsense: Intel® RealSense™ SDK
Intel® RealSense™ SDK. Contribute to IntelRealSense/librealsense development by creating an account on GitHub.
github.com
Realsense SDK를 사용하는 방법은 위 github 링크를 참고하여도 좋다.
기본적인 설치 방법은 아래와 같다.
sudo apt-get install librealsense2-dkms
sudo apt-get install librealsense2-utils
sudo apt-get install librealsense2-dev
sudo apt-get install librealsense2-dbg
위 방식대로 realsense SDK 설치시 최신 버전이 설치된다.
하지만 ORB_SLAM3에서 사용하는 Realsense SDK의 버전은 2.50.0 이다.
아래는 2.50.0을 Ubuntu 18.04에 직접 설치하는 방법이다.
git clone https://github.com/IntelRealSense/librealsense.git
cd librealsense
git checkout v2.50.0
공식 가이드에 따르면 커널 버전 4.[4,8,10,13,15,16] 에서 지원한다고 되어 있지만 5.3.0-050300-generic에서도 가능하다.
LibRealsense를 위한 라이브러리 설치
sudo apt-get install libssl-dev libusb-1.0-0-dev libudev-dev pkg-config libgtk-3-dev cmake
sudo apt-get install libglfw3-dev libgl1-mesa-dev libglu1-mesa-dev at
librealsense 루트 디렉토리에서 Intel Realsense 권한 스크립트를 실행
./scripts/setup_udev_rules.sh
패치된 커널 모듈을 빌드하고 적용
./scripts/patch-realsense-ubuntu-lts.sh
위 명령을 수행한 후 ubuntu-bionic-5 레파지토리 생성 후 프로세스가 진행되지 않는다면
스크립트 파일 실행을 강제 종료하고 아래 작업을 patch-realsense-ubuntu-lts.sh에 수행 후 다시 스크립트 파일을 실행한다.
# Get the linux kernel and change into source tree
if [ ! -d ${kernel_name} ]; then
	mkdir ${kernel_name}
	cd ${kernel_name}
	git init
	git remote add origin git://kernel.ubuntu.com/ubuntu/ubuntu-${ubuntu_codename}.git
	cd ..
fi
부분을
# Get the linux kernel and change into source tree
if [ ! -d ${kernel_name} ]; then
	mkdir ${kernel_name}
	cd ${kernel_name}
	git init
	git remote add origin https://kernel.ubuntu.com/ubuntu/ubuntu-${ubuntu_codename}.git
	cd ..
fi
위와 같이 수정한다.
추적 모듈이 제대로 작동하려면 hid_sensor_custom 커널 모듈이 필요
echo 'hid_sensor_custom' | sudo tee -a /etc/modules
librealsense 루트 디렉터리 로 이동하여 실행
mkdir build && cd build
CMake를 실행
cmake ../ -DCMAKE_BUILD_TYPE=Release
make -j4
sudo make install
install이 완료 되었다면 realsense-viewer를 터미널에 입력하여 SDK가 제대로 설치 되었는지 확인
만약 not found 에러가 발생하면 터미널을 껏다 키고
그래도 안된다면 restart 후 터미널에 입력해 보면 실행이 된다.
Firmware 다운로드
SDK 버전 2.50.0에서 지원하는 Firmware 버전은 5.13.0.50. Compatible with Librealsense SDK v2.39.0** (+) 이다.
https://dev.intelrealsense.com/docs/firmware-releases
Firmware releases D400
Firmware release files for Intel® RealSense™ products for use on all supported operating systems.DocumentationSpecification Clarification - March 2023 Release (link to PDF attached)Refer to the Intel RealSense product documentation (PDF) included in the
dev.intelrealsense.com
위 경로에서 Version : 5.13.0.50을 찾아 다운로드 받고
다운받은 Zip 파일을 압축 해제한다.
압축을 해제하면 아래와 같은 파일 트리가 존재한다.
D400_Series_FW_5_13_0_50
├── Legal_Notices
├── RealSense-D400-Series-Spec-Update.pdf
└── Signed_Image_UVC_5_13_0_50.bin
여기서 bin 파일이 중요한 요소이다.
D435i Firmware 설치하기
다운받은 Fimware의 bin 파일을 D435i에 설치하기 위해 디바이스를 USB 3.0을 이용해 연결한다.
이후 SDK 설치시 함께 설치되는 rs-fw-update를 사용한다.
rs-fw-update -f ~/D400_Series_FW_5_13_0_50/Signed_Image_UVC_5_13_0_50.bin
Update가 완료 된 후 realsense-viewer를 실행 하고 모든 디바이스의 기능이 활성화 되었는지 확인

ORB_SLAM3 실행하기
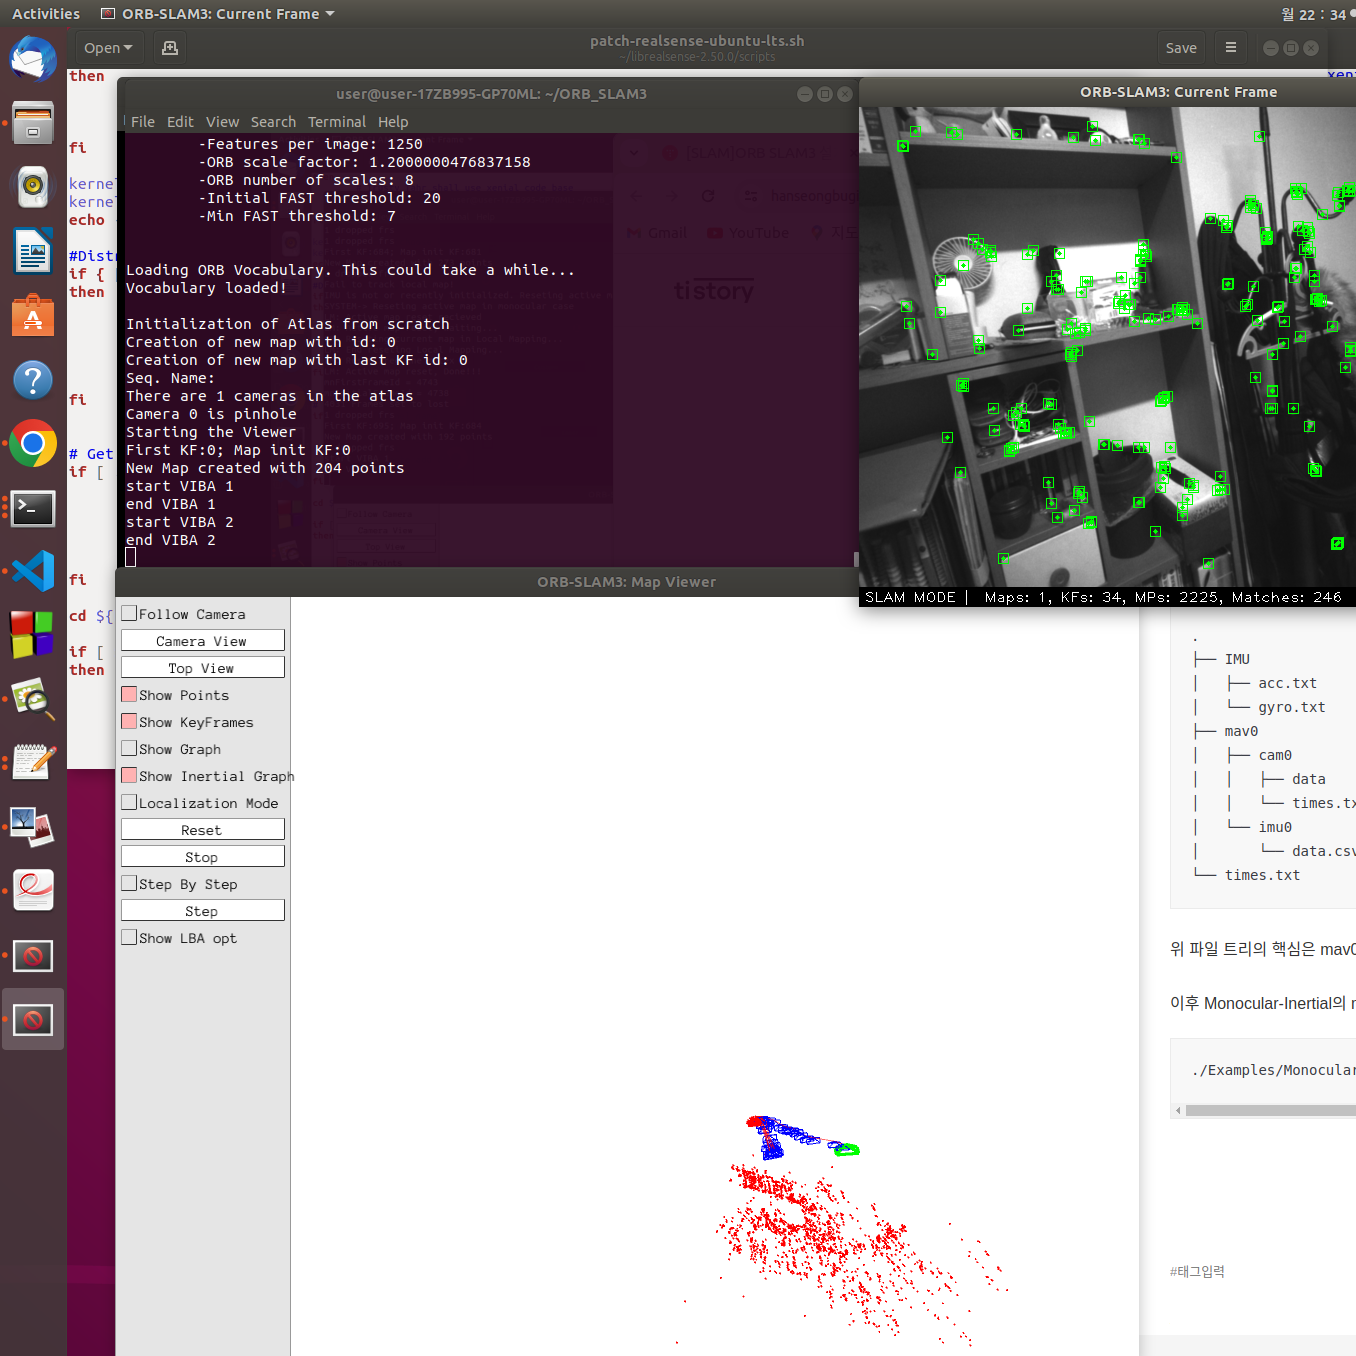
ORB_SLAM3에서는 D435i를 통해 실시간으로 Tracking하는 기능과 Image와 센서 데이터를 수집하는 기능을 제공한다.
먼저 실시간 Tracking하는 방법이다.
./Examples/Monocular-Inertial/mono_inertial_realsense_D435i ./Vocabulary/ORBvoc.txt ./Examples/Monocular-Inertial/RealSense_D435i.yaml
다음은 녹화하는 방법이다.
./Examples/Calibration/recorder_realsense_D435i ./Examples/Calibration/recorder
녹화는 SIGINT 시그널로 종료할 수 있다.(Ctrl+C)
이후 센서 데이터의 시간을 동가화를 진행해야한다.
python3 ./Examples/Calibration/python_scripts/process_imu.py ./Examples/Calibration/recorder/
이후 파일 구조를 MH_01과 유사한 구조로 변경한다.
.
├── IMU
│   ├── acc.txt
│   └── gyro.txt
├── mav0
│   ├── cam0
│   │   ├── data
│   │   └── times.txt
│   └── imu0
│       └── data.csv
└── times.txt
위 파일 트리의 핵심은 mav0 디렉터리의 존재 유무이다.
이후 Monocular-Inertial의 mono_inertial_euroc를 통해 녹화한 영상을 실행한다.
./Examples/Monocular-Inertial/mono_inertial_euroc ./Vocabulary/ORBvoc.txt ./Examples/Monocular-Inertial/RealSense_D435i.yaml ./Examples/Calibration/recorder/ ./Examples/Calibration/recorder/times.txt

'잡다한이야기' 카테고리의 다른 글
| MURERbot 리뷰 (4) | 2024.11.16 |
|---|---|
| [SLAM]ORB SLAM3 설치하기 (0) | 2024.01.15 |
| [Mac] Window 11 가상환경 설치 (0) | 2023.10.07 |
